To replace the pull cord on a lawn mower, first, remove the cord assembly cover and old cord. Then, attach the new cord to the pulley and rewind it onto the starter spool.
Keeping your lawn mower in good working order is essential for achieving a healthy, well-manicured lawn. One part that can often wear out or break is the starter cord which is used to start the engine. As such, it’s important to know how to replace the pull cord on a lawn mower.
In this guide, we will take you step by step on how to replace the cord so you can get back to caring for your lawn without any fuss.
Understanding The Basics Of Pull Cord Replacement
A lawn mower is an important tool in keeping lawns trimmed and tidy. However, over time, the pull cord that starts it can fray, break, or become stuck. In this section, we will guide you on how to replace the pull cord on your lawn mower quickly and efficiently.
The Tools Required For A Successful Pull Cord Replacement
Before we begin the pull cord replacement process, you’ll need the following tools:
- Screwdrivers
- Pliers
- Wrenches
- Socket set
- New pull cord
- Vise grip
- Scissors
Step-By-Step Guide On How To Remove The Faulty Pull Cord From The Lawn Mower
- The first stage is to remove the top cover of your lawn mower, exposing the pull cord. You can do this by removing any screws or bolts. Be sure to keep all the parts in a safe place to avoid losing any during the process.
- Once you have removed the top cover, locate the starter instrument. You should be able to find it easily as it connects directly to the pull cord.
- Carefully remove the starter mechanism and separate the remaining pieces of the old cord. A pair of pliers will be handy in removing any frayed or stuck parts.
- Next, remove the old pull cord. You can do this by unwinding it from the starter mechanism, usually located inside the pulley. Be careful not to wear it entirely from the pulley.
- Once you have removed the old cord, attach the new one. Insert the new cord into the starter mechanism and tie a knot at the end of the cord.
- Wind the new cord around the starter mechanism. Once you have done that, place it back into position and reattach it to the cover.
- Test the new pull cord by pulling it to make sure it is working correctly. If it works well, reattach the cover.
Moreover, take a look at: How to Remove Lawn Mower Spark Plug?
Tips And Tricks To Ensure Safety During The Process
- Ensure the lawn mower’s engine is off before starting the pull cord replacement process.
- Detach the spark plug from the mower to ensure safety.
- Use the pliers and wrenches to remove any frayed or stuck parts to avoid injury.
- Wear gloves and eye protection throughout the process to avoid any accidental injuries.
- Be gentle with the parts and cords to avoid any damage to the mower.
Knowing how to replace a pull cord on a lawn mower can save you time and money. By following our detailed guide and using the correct tools, you can get your mower up and running in no time. Always prioritize safety when handling any equipment.
Preparing To Install The New Pull Cord
Replacing a pull cord on a lawnmower is a simple and affordable fix that you can complete in minutes. Preparing to install the new cord is crucial to ensure that everything runs smoothly. Here are some important points to keep in mind:
How To Choose The Appropriate Replacement Pull Cord And The Importance Of Measuring It Correctly
- The first step is to purchase the correct replacement pull cord for your lawnmower. You can find the cord at your local hardware store or online.
- It’s important to select a cord that is the correct length and diameter for your lawnmower to avoid any issues in the future.
- Measure the old cord and take note of the length and diameter to ensure that you purchase the correct replacement cord.
The Right Way To Wind The Spring Back Into The Starter Assembly
- With the old cord removed, inspect the starter assembly and look for any damage or wear and tear. If there are any issues, manage them before installing the replacement cord.
- Wind the spring in the starter assembly according to the manufacturer’s instructions. Be sure to wind it tightly, but not too tight, or it may not work appropriately.
- Once the spring is wound, hold it in place with a screwdriver and thread the replacement cord through the starter body.
How To Choose The Right Knot To Tie The Pull Cord To The Starter Assembly
- Tie the replacement cord in a knot that is appropriate for the specific starter assembly. The correct knot will ensure that the cord stays in place during use.
- Different lawnmowers may have different starter assemblies, so it’s important to select the correct knot for your specific lawnmower.
- After tying the knot, test the cord to make sure it rejects smoothly and starts the lawnmower without any issues.
Following these steps will help you replace the pull cord on your lawnmower with ease. It’s important to have the right replacement cord, wind the spring perfectly, and tie the knot appropriately to ensure that the cord works correctly. With these easy fixes, you’ll be back to mowing your lawn in no time!
Furthermore, consider reading: How to Drain Gas from Lawn Mower
Installing The New Pull Cord
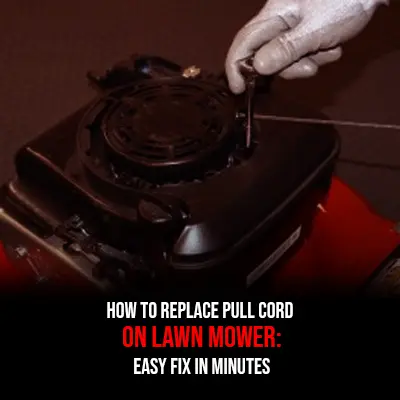
How to replace pull cord on lawn mower: easy fix in minutes
It’s essential to keep your lawn mower performing at its best, and a vital part of that is ensuring that the pull cord is in good shape. If it breaks, don’t worry; you can replace it yourself easily. In this post, we outline the step-by-step process to install the new pull cord onto the starter assembly and provide tips and tricks to avoid common errors during installation.
We also provide information on how to test the new pull cord to ensure it’s functioning correctly.
Step-By-Step Process To Install The New Pull Cord Onto The Starter Assembly
To install a new pull cord successfully, follow these steps:
- Remove the starter assembly cover: To access the pull cord, you will need to remove the starter assembly cover from the lawn mower. Unscrew the bolts or screws that are holding it in place, but remember to keep them in a safe place.
- Remove the old pull cord: Carefully unwind the old pull cord from around the starter assembly and cut the knot that’s holding it in place. Once you’ve done that, move the starter pulley to its initial position.
- Install the new pull cord: Thread the new pull cord through the hole in the starter assembly and tie a knot in the end. Wind the cord around the pulley, following the original pattern until it’s fully wound up.
- Reattach the starter assembly cover: Once the new pull cord is in place, reattach the starter assembly cover. Tighten the screws or bolts that were removed earlier.
Tips And Tricks To Avoid Common Errors During Installation
Here are some tips to help you avoid mistakes during pull cord installation:
- Cut the right length of the pull cord: Before installation, make sure you cut the new cord to the correct length you need. Keep in mind the length will vary by brand and model.
- Avoid over-tightening the starter assembly cover: Over-tightening the cover can cause damage to both the cover and the lawn mower’s pull cord mechanism. Always tighten to the manufacturer’s specifications.
- Ensure that the knot securing the pull cord in place is tight: A loose knot can cause the pull cord to solve, leading to the need for another replacement.
How To Test The New Pull Cord To Ensure It’S Functioning Properly
To make sure the new pull cord is accurately installed and functioning as it should, follow these steps:
- Re-attach the spark plug: Once the starter body cover is back in place, re-attach the spark plug.
- Give the cord a gentle tug: Grab the pull cord handle and give it a gentle tug. It should easily pull out and retract. If it’s sticking or doesn’t abandon, then the cord installation may need adjusting.
- Check for smooth retraction: Release the pull cord and allow it to retract smoothly.
Replacing a pull cord on a lawn mower is something you can do yourself with just a few tools. Following these simple steps, you can install a new cord and ensure it’s functioning correctly, allowing you to continue mowing your lawn without interruption.
Additionally, check out: How to Make a Lawn Mower Faster?
Frequently Asked Questions On How To Replace Pull Cord On Lawn Mower
If the cord is frayed, broken or the engine won’t start, it’s time to replace the pull cord. Check for any damage or wear on the cord, and see if it needs replacing.
You’ll need a wrench, pliers, a socket set, and a screwdriver to replace the pull cord on a lawn mower. Make sure to check the owner’s manual for any specific tools required.
First, remove the rewind assembly cover and the old cord. Attach the new cord to the starter pulley, then wind the spring. Reattach the cover and test the new cord.
Yes, you need to replace the pull cord on a lawn mower if it is damaged or broken. Restarting to use a damaged cord can cause further damage to the engine or cause it not to start.
You can replace the pull cord on a lawn mower yourself, following the steps in your owner’s manual. If you’re uncertain of any steps or need assistance, consult a professional for help.
Conclusion
With these step-by-step instructions, replacing the pull cord on your lawn mower should be a breeze. It’s important to remember to always take safety protection, like wearing goggles and gloves, before starting the process. Also, ensuring you have the correct replacement cord and understanding how to properly wind the cord onto the pulley is key to a successful repair.
With a little patience and attention to detail, you can save time and money by fixing the pull cord yourself instead of taking your mower to a professional. By regularly maintaining your lawn mower and fixing small issues like the pull cord, you can extend the life of your machine and keep it running smoothly for years to come.
Happy mowing!
1 thought on “How to Replace Pull Cord on Lawn Mower: Easy Fix in Minutes”