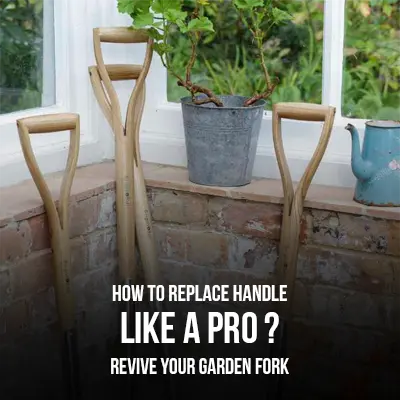
To replace a garden fork handle, remove the old handle and attach a new one using screws or epoxy. Garden fork handles can wear out or break over time, but replacing them is a straightforward process that can save you from having to buy a new tool.
First, remove the old handle by unscrewing or cutting it off. Then, attach the new handle using screws or epoxy. Most garden fork handles come with pre-drilled holes, but if they don’t, you may need to drill them yourself. Once the handle is securely attached, you can get back to your gardening tasks with a tool that’s as good as new.
Tools And Materials Needed
List Of Necessary Tools And Materials
Replacing a garden fork handle is not a difficult task, but to get it done correctly, you require some necessary tools and materials. Here’s what you’ll need:
- Safety goggles
- Gloves
- Hammer
- Saw
- New fork handle
- Drill
- Drill bits (matching the size of the handle screws)
- Screwdriver
- Sandpaper
Safety Precautions To Keep In Mind
Before starting the process, it’s important to keep in mind some safety precautions to avoid any harm. Here are some tips that can come in handy:
- Wear safety goggles to protect your eyes from wood shavings or splinters.
- Gloves can avoid getting bruises and splinters on your hands while working.
- Do not rush or apply excessive force; it can lead to injury or damage to the handle.
- Always keep the sharp tools away from the children, and if any tool is not in use, put it in a safe place.
So, follow these guidelines and write an informative piece that’s enjoyable to read.
In addition, don’t forget to read: Essential Gardening Hand Tools
Remove The Old Handle
Step By Step Instructions On How To Remove The Old Handle
Are you having trouble with a garden fork with a broken handle? Replacing the handle is the easiest solution, and any DIY enthusiast can handle it. The following is a step-by-step guide to removing the old handle:
- Remove any dirt or debris around the handle with a dry cloth or brush.
- Secure the garden fork in a vice, but be careful not to clamp down too tightly, so as not to damage the prongs or tines.
- Check the old handle. You will probably see that a metal pin runs through it from the top of the forkhead to the lower portion of the handle. Locate the top of the pin, which may require removing any bolts or screws holding the forkhead in place.
- Use a hammer and punch to knock the pin out of the handle. You will need to align the pin with the punch before tapping it with a hammer.
- Once the pin is free, you can start tapping the old handle head off with a hammer. Be gentle and make sure the forkhead remains persistent.
- Keep tapping the handle until it comes off entirely. Your garden fork should now be ready for a new handle.
Tips For Removing Stubborn Handles
Some garden fork handles may be challenging to remove, and you could experience problems in the process. In such cases, you can use the following tips to help you remove the handle:
- Apply heat to the forkhead before removing the handle. Heat will cause the metal parts to extend, making the handle detach more quickly. Heat the forkhead with a propane torch or use boiling water. However, avoid using this method if the forkhead has any attached plastic handles.
- Use a penetrating oil such as wd-40 to loosen the handle from the fork head. Spray the oil onto the metal components and allow it to seep into the joints for 15 to 20 minutes before attempting to remove the handle. The oil should help to dissolve any rust that may have gathered.
- Use a hacksaw or reciprocating saw to slice through the old handle. If the handle is all-metal (without any wood or plastic components), you can use a metal saw to cut it from the fork head.
How To Avoid Damaging The Fork Or Prongs During The Process
When removing garden fork handles, you need to be careful not to damage the fork or prongs in the process. Here are a few tips to help you:
- Use a rubber mallet instead of a steel hammer. It is important to avoid striking the forkhead or prongs with a metal hammer which can damage the tines or bend the prongs.
- Wrap the forkhead with a cloth or masking tape to protect it from hammer strikes.
- Use a proper-sized drill bit, so the drill will not damage the prongs or tines during the process.
By following all of these tips, you can successfully remove your garden fork’s old handle without damaging the tool, making it ready for a new one.
Choose The Right Replacement Handle
Replacing a garden fork handle may seem like a daunting task, but with the right tools and instructions, it’s an easy DIY task that you can handle with confidence. One of the most critical steps in the process is choosing the appropriate replacement handle.
In this section, we’ll discuss the factors to consider when selecting the right replacement handle, the explanation of handle materials, lengths, and shapes, and how to measure the right length for the fork.
Factors To Consider When Selecting The Right Replacement Handle
When selecting the right alternate handle for your garden fork, consider the following factors:
- Handle material: The most common materials for garden fork handles are wood and composite materials. While wood may be more traditional, composite materials are more durable, weather-resistant, and offer a better grip.
- Handle length: The handle length is another necessary thing to consider. The length of the handle affects the balance of the fork and the reach of the user. Normally, longer handles provide more leverage and are ideal for taller individuals, while shorter handles are suitable for those who need better control and tight spaces.
- Handle shape: The handle shape is essential for a comfortable grip. Some handles are straight, while others are curved or ergonomically designed to provide a comfortable grip.
Explanation Of Handle Materials, Lengths, And Shapes
Now that we have discussed the factors to consider when selecting the appropriate replacement grip let us now explain handle materials, lengths, and shapes in detail:
Handle materials:
- Wood: Wood is a traditional and classic choice for garden fork handles. It’s durable and stands up to work well, but can be easy to damage from damp conditions and insects. You can choose from a variety of woods like ash, hickory, or maple, depending on your choice.
- Composite: Composite materials are more durable than wood and weather-resistant. They provide an excellent grip but cost more than wood handles. Also, composite materials provide less shock absorption than wood handles.
- Handle lengths:
- Generally, garden fork handles come in lengths ranging from 28-32 inches (71-81 cm) or 42-48 inches (107-122 cm). Taller individuals may find longer handles more comfortable, as they provide more leverage, while shorter handles are ideal for those who need better control in tight spaces.
- Handle shapes:
- Straight handles: These handles are the most common and are perfect for basic forks. Straight handles provide good grip and control.
- Curved handles: These handles are ergonomically designed to provide comfort and reduce stress on the wrist. Curved handles are ideal for those who use forks for extended periods.
How To Measure The Appropriate Length For The Fork
To measure the appropriate length for the fork, follow these steps:
- Measure the existing handle length: Measure the length of the existing handle from the top of the forkhead to the end of the handle.
- Choose the appropriate length: Depending on your height and comfort, select the appropriate handle length. Longer handles provide more leverage, while shorter handles offer better control.
- Cut the new handle to size: If the new handle is longer than necessary, cut it to the appropriate size using a saw or sharp knife. Ensure that you wear goggles and gloves to prevent injury.
Choosing the appropriate replacement handle is critical to ensure better grip, control, and comfort while using your garden fork. Consider the handle material, length, and shape when choosing a replacement handle. Follow the guide above to measure the right handle size for your garden fork and finish the replacement process with ease.
Moreover, explore: How to Use Garden Fork?
Install The New Handle
Step By Step Instructions On How To Prepare The Fork For The New Handle
Before installing the new handle, it’s essential to prepare the fork. Follow these simple steps:
- Remove the old handle: Use a hacksaw or handsaw to cut off the old handle as close to the head of the fork as possible. Then, use a hammer and punch to knock the remaining wood out of the metal tang.
- Clean the tang: Using a wire brush, remove any rust or debris from the metal tang. This process will ensure a proper fit for the new handle.
- Sand the fork: Using sandpaper, smooth out any rough edges on the fork. This step will make it easier to slide the handle onto the fork’s metal tang.
How To Ensure The New Handle Is Secure And Tight
Now that the fork is prepared for the new handle let’s look at how to secure the handle to the fork:
- Choose the right size handle: The handle should fit snugly on the tang to ensure it doesn’t tilt or become loose.
- Apply some lubricant: Rub some beeswax or soap on the metal tang before slipping the handle onto the fork. The lubricant will make it easier to install the handle.
- Pound the handle: Place the fork on the ground with the metal tang sticking up. Hold the handle firmly and pound down on the fork’s tang. This action will help secure the handle into place.
- Drill a hole: For extra security, drill a hole through the handle and tang, then insert a screw. This method will ensure the handle doesn’t loosen up over time.
Tips For Aligning The Fork With The New Handle
Aligning the fork with the new handle is essential to ensure comfortable use. Follow these tips to ensure you get it right:
- Position the handle correctly: The handle should be vertical to the fork’s head. This positioning ensures comfort and ease of use.
- Mark the handle: Before you assemble the fork and handle, mark the handle’s position with a pencil. This step is particularly helpful if you need to adjust the handle.
- Check your work: After you’ve connected the fork and handle, double-check that the handle is perpendicular to the fork’s head. You can do this by holding the fork sidewards and looking at the alignment from the bottom.
With these simple instructions and tips, replacing your garden fork handle should be a breeze.
Frequently Asked Questions For How To Replace A Garden Fork Handle
What Tools Are Needed To Replace A Garden Fork Handle?
You will need a vice, drill, screws, rivets, screwdriver, metal saw, and a new handle that’s the right size.
How Do I Remove The Old Handle From My Garden Fork?
Clamp the fork in the vice, then cut or drill through any rivets or screws holding the old handle in place. Remove the old handle.
What Type Of Handle Should I Choose To Replace My Old One?
The handle you pick should be the same size and shape as the old one. You can also choose from different materials like wood, metal, or plastic.
How Do I Attach The New Handle To My Garden Fork?
Place the new handle into the fork socket and secure it with rivets or screws. Make sure the new handle is securely tied.
Can I Replace The Handle On Any Type Of Garden Fork?
Most types of garden forks can have their handles replaced. Just make sure you choose the right size and shape for your fork.
Conclusion
Updating a garden fork handle can be a challenging task, but it doesn’t have to be. With the right tools and some simple steps, you can replace a garden fork handle in no time. Remember to choose the right type of wood for your handle and measure it accurately to ensure a comfortable and secure fit.
Follow the steps carefully, and your garden fork will be as good as new. Maintaining your garden tools not only saves you money but also extends their lifespan. The next time you need to replace a garden fork handle, you’ll know exactly what to do.
Don’t let a broken handle dishearten you; take charge of the situation and get it fixed! Happy gardening!
2 thoughts on “How to Replace Handle Like a Pro ? Revive Your Garden Fork”