To install an automatic sprinkler timer, first, turn off the main water supply and connect the timer to the water source. Then, attach the sprinkler system to the timer and program it according to your watering needs.
An automatic sprinkler timer is a convenient device that automates your sprinkler system’s watering schedule. Once installed, it takes over the task of turning your sprinklers on and off at pre-set times, saving you time and effort. This device can also help conserve water by providing a consistent watering schedule that prevents over-watering and runoff.
Installing an automatic sprinkler timer requires a few basic tools and some plumbing knowledge. By following a few simple steps, you can easily install an automatic sprinkler timer and start enjoying the benefits of a well-irrigated lawn or garden.
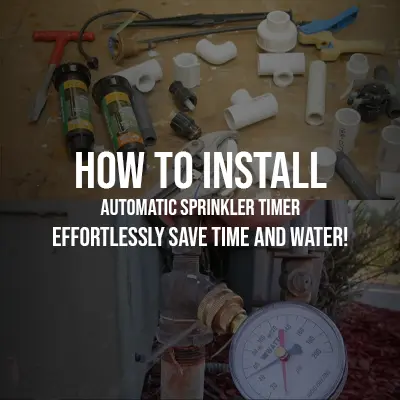
Step 1: Gather The Necessary Tools And Equipment
Installing an automatic sprinkler timer is a great way to save time and water when taking care of your lawn. However, before you start the installation process, you need to gather all the necessary tools and equipment. This ensures a smooth and efficient installation process.
Moreover, explore: How Automatic Sprinkler Systems Work
Discuss The Required Tools And Equipment
To install an automatic sprinkler timer, you’ll need the right tools and equipment. Here are the essential items you need:
- Screwdrivers
- Wire stripper
- Electrical tape
- Wire connectors
- Wire nuts
- Drill with bits
- Pliers
- Voltage tester
- Pvc cutter
- Timer
Each of these tools and equipment is necessary for the installation process, and you cannot install a sprinkler without them. Make sure you have all of them before you start the installation process.
Explain The Importance Of Having Everything Ready Before Starting The Installation Process
Now that you know the type of tools and equipment needed, it’s essential to have everything ready before starting the installation process. Here is why:
- It saves time: When you have everything ready, you don’t have to spend time looking for tools and equipment. You’ll start the installation process right away, saving you time.
- It ensures an efficient installation process: With all the tools and equipment readily available, you’ll quickly install the automatic sprinkler timer. You’ll avoid any unnecessary delays or problems resulting from a lack of equipment.
- It ensures safety: Having all the necessary tools and equipment ensures that you don’t use inappropriate tools for the job. You’ll stay safe throughout the installation process.
Gathering the necessary tools and equipment ensures a smooth and efficient installation process while keeping you safe. Be sure to have everything ready before starting the installation process to avoid any unnecessary delays.
Step 2: Turn Off The Water And Electrical Supply
Discuss The Significance Of Turning Off The Water And Electrical Supply To The Irrigation System
During the installation of an automatic sprinkler timer, it is difficult to shut off both the water and electrical supply to the irrigation system to prevent any accidents or damages. Turning off the water supply will prevent any water from entering the system, which could damage the timer or other components, and turning off the electrical supply will be precautionary against any electrical shocks or potential electrical damage.
It is essential to follow this step precisely to ensure that the installation process is safe.
Furthermore, consider reading: How to Fix Your Automatic Sprinkler System
Provide A Detailed Procedure To Accomplish This Step
To successfully turn off the water and electrical supply when installing an automatic sprinkler timer, follow these steps:
- Locate the main water supply valve – the main water supply valve is usually located near the irrigation system’s water meter.
- Turn off the water supply valve – turn the valve clockwise to shut off the water supply. Ensure that the valve is fully closed to prevent any water from entering the system.
- Locate the electrical supply switch – the switch can usually be found near the timer or electrical box for the irrigation system.
- Turn off the electrical supply switch – turn off the switch by flipping it to the off position to prevent any electrical shock or damage to you and the system.
- Check the system – after turning off the water and electrical supply, double-check to make sure that both are completely off.
Always prioritize safety when working with an automatic sprinkler timer. By following these steps and ensuring that the water and electrical supply are correctly turned off, you can reduce the risk of any accidents during the installation process.
Step 3: Remove The Existing Irrigation Timer
Installing an automatic sprinkler timer can be a wise investment for any homeowner looking to optimize their water usage and maintain a well-manicured yard with minimal effort. As you start on this journey, you will notice that there are several steps involved in the installation process.
One of the essential steps is removing the existing irrigation timer. We will explain the process and detail the precautions you should take during this step.
Explain The Process Of Removing The Existing Irrigation Timer
To replace your existing irrigation timer with an automatic sprinkler timer, you will need to follow the process below.
- First and foremost, shut off the water supply to your sprinkler system. This is usually located close to where the main water source enters your home.
- Next, disconnect the power supply to your existing irrigation timer from the main source of electricity to ensure your safety. You should also remove the battery backup if your timer has one.
- Unscrew or unclip the cover to reveal the wiring connections. Take a photo or make a note of where each wire is connected to the existing timer, as it will help you when connecting the wiring to the new automatic sprinkler timer.
- Carefully remove the wiring by loosening the wire connectors. Always pull the wires from the connector, not the wire itself. If you damage the wires, it can cause problems during the installation process.
- After you have removed the wiring, unscrew the mounting screws that hold the timer in place. Carefully remove the old irrigation timer from the wall.
Highlight The Importance Of Cautiousness During This Step
When you are removing the existing irrigation timer, it is essential to take precautions to ensure your safety and prevent any damage to the existing wiring or electrical systems. Here are some precautions to follow:
- Always turn off the water supply to the sprinkler system before you start working, as it can prevent any accidental flooding or water damage.
- Protect your hands and eyes by wearing gloves and goggles to avoid injury when handling wires and electrical components.
- Ensure you disconnect any power sources and remove the battery backup before you start working on the wiring to prevent any electrical accidents.
- Make sure not to yank or pull on the wiring to avoid any damage to the insulation or electrical lines. It can cause an electrical short circuit or other issues during the installation process.
- When you remove the irrigation timer from the wall, ensure you do it carefully to avoid damaging any other electrical systems on the same circuit.
Removing the existing irrigation timer is an important step in installing an automatic sprinkler timer. By following these precautions and steps, you should be able to remove your old timer without any issues. Once you have successfully removed the old irrigation timer, you can go ahead and start installing the new automatic sprinkler timer.
Additionally, it is worth mentioning: DIY Guide on Installing Automatic Valves
Step 4: Install The New Automatic Sprinkler Timer
Discuss The Process Of Installing The New Automatic Sprinkler Timer
Installing a new automatic sprinkler timer in your irrigation system ensures that your lawn or garden is watered adequately while preserving valuable resources. Here are the key steps to take when installing a new automatic sprinkler timer:
- Turn off the main water supply to the irrigation system before starting the installation process.
- Remove the old timer and wiring from the wall and disconnect the wires.
- Install the mounting bracket on the wall where the new timer will be placed.
- Connect the wires from the irrigation system to the new timer, following the manufacturer’s instructions carefully.
- Attach the timer to the mounting bracket and double-check all connections to ensure they are secure.
Highlight The Importance Of Following The Manufacturer’s Instructions To The Letter
It is hard to read and understand the manufacturer’s instructions thoroughly and follow them precisely when installing an automatic sprinkler timer. Failing to adhere to the guidance provided can lead to system malfunctions, timers that don’t work, miswired connections, or even electrical hazards.
When installing the new automatic sprinkler timer:
- Always use the manufacturer-supplied manual or installation guide.
- Make sure that the power to the irrigation system is switched off before attempting any modifications.
- Double-check that all wiring connections match the manufacturer’s guidance, and the timer is securely mounted to prevent it from falling.
- Test the new automatic sprinkler timer to make sure that it works properly before turning it over to automatic mode.
Following the manufacturer’s recommendations will ensure a successful installation process, provide peace of mind, and help the irrigation system function flawlessly while conserving water and resources.
Step 5: Test The Automatic Sprinkler Timer
A highly efficient and easy-to-maintain garden requires an automatic sprinkler timer. Once you have successfully installed your sprinkler timer, do not think that everything is perfectly fine unless it has been tested. A sprinkler timer is much like an electrical appliance, and it needs to undergo proper testing to ensure that it works as required.
Here we’ll discuss the importance of testing the automatic sprinkler timer and provide a step-by-step procedure on how to conduct the test and also explain the role of troubleshooting if the test fails.
Discuss The Importance Of Testing The Timer
It is essential to test your automatic sprinkler timer to ensure it works correctly, so you have no surprises once you’ve finished installing the system. You’ll save both money and headaches by checking the timer before installing the valves and mounting the sprinkler heads.
Testing the timer gives you the confidence to know that the device will work reliably and ensure your plants and grass receive enough water when necessary.
Provide A Step-By-Step Procedure On How To Conduct The Test
Conducting a sprinkler timer test is effortless, and it generally involves four critical steps.
- Turn on the main water valve.
- Set the timer to turn on the sprinklers either manually or automatically.
- Check each of the sprinklers, ensuring that the water is flowing correctly and that they cover their aligned area.
- Change the watering duration and days of the week to see if the timer adjusts the watering frequency accordingly.
Explain The Role Of Troubleshooting If The Test Fails
If the test fails, ensure that you observe all the diagnostic measures for opening and testing the wires, adjusting the timer, resetting the timer, and finally resetting the entire system. Follow the manufacturer’s procedure for troubleshooting to determine what’s wrong with the timer or the system itself.
Your troubleshooting should also include checking if the system has any clogged pipes or if any of the sprinkler heads are broken, as these can lead to inadequate watering.
Testing your automatic sprinkler timer assures you that your plants are receiving the necessary water irrigation, making it a crucial part of the installation process. Don’t miss the importance of testing the timer that could ultimately give your entire irrigation system pointless.
Also, make sure to read: How to Perfectly Adjust Your Automatic Sprinkler Heads
A well-optimized sprinkler system will give you the desired results, and troubleshooting will ensure that the system runs smoothly for an extended period.
Frequently Asked Questions For How To Install Automatic Sprinkler Timer
How Do I Choose The Right Automatic Sprinkler Timer?
When choosing a sprinkler timer, consider the number of stations, the type of controller, the ease of installation, and the flexibility in programming.
How Do I Install An Automatic Sprinkler Timer?
To install an automatic sprinkler timer, turn off the water supply and electricity. Mount the timer, attach the wires, connect the valves, and program the timer.
How Do I Program An Automatic Sprinkler Timer?
To program an automatic sprinkler timer, set the current time and date, select the watering days and times, set the duration for each station, and save the settings.
How Often Should I Water My Lawn With An Automatic Sprinkler Timer?
The frequency of watering with an automatic sprinkler timer depends on various factors such as the type of grass, temperature, and soil type. As a common rule, water deeply once or twice a week rather than shallow watering daily.
Can I Use An Automatic Sprinkler Timer For Drip Irrigation?
Yes, an automatic sprinkler timer can be used for drip irrigation if the timer has a separate valve for the drip system. This allows you to control the watering frequency and duration of your drip system independently.
Conclusion
So, after following these steps, you can now fully enjoy the benefits of an automatic sprinkler timer, such as saving time, conserving water, and maintaining a healthy lawn or garden. This simple home improvement project is easy to execute and is definitely worth the investment.
Remember to check your automatic sprinkler timer regularly to ensure that it is working as intended. If you face any issues, refer to the manual or seek professional help. With proper maintenance and care, your automatic sprinkler timer can serve you well for years to come.
Happy watering!
2 thoughts on “How to Install Automatic Sprinkler Timer: Effortlessly Save Time and Water!”