To till a garden, use a tiller or a garden fork to loosen and turn the soil. Tilling a garden is an essential process that must be done to prepare the soil for planting.
Whether you’re starting a new garden or maintaining an existing one, tilling can make a big difference in the health and productivity of your plants. The process of tilling involves loosening and turning the soil to create a better environment for roots to grow, allowing for better water and nutrient absorption.
While tilling can be done with a garden fork, a tiller is often the best tool for the job, as it can quickly break up soil and turn it over. It is important to follow a few guidelines when tilling, such as avoiding over-tilling and making sure the soil is dry enough to work with. With these tips in mind, you’ll be well on your way to a successful garden.
Understanding The Basics Of Garden Tilling
Garden tilling is an essential aspect of gardening that involves breaking up the soil and preparing it for planting. It helps to loosen the soil, allowing air, water, and nutrients to penetrate the soil to promote healthy plant growth. Whether you are a seasoned gardener or a beginner, understanding the basics of garden tilling is important to ensure a generous harvest.
What Is Garden Tilling?
Garden tilling is the process of breaking up the soil and preparing it for planting. It involves digging or turning over the soil to aerate it, break up compacted soil, and remove rocks, weeds, and plant debris. Tilling can be done using a variety of tools, including a hoe, rake, cultivator, or rototiller.
Importance Of Garden Tilling
Proper garden tilling is crucial for healthy plant growth and a bountiful harvest. Here are some key reasons why garden tilling is important:
- Improves soil structure: Garden tilling breaks up compacted soil, improves soil drainage and water retention, and creates air pockets in the soil, promoting healthy plant growth.
- Controls weeds: Tilling helps to remove weeds and other unwanted plant debris from the soil, reducing competition for nutrients and sunlight.
- Promotes nutrient uptake: Tilling helps to mix organic matter and fertilizer into the soil, providing essential nutrients for plant growth.
- Improves soil temperature: Tilling helps to warm up the soil, promoting seed germination and early plant growth.
- Prevents soil erosion: Tilling can help to prevent soil erosion by creating a rough surface that slows down water runoff.
Understanding the basics of garden tilling is important to ensure a successful garden. Tilling helps to improve soil structure, control weeds, promote nutrient uptake, improve soil temperature, and prevent soil erosion. By following proper tilling techniques, you can create a healthy and productive garden that will yield bountiful harvests year after year.
In addition, don’t forget to read: How Deep to Till Garden
Preparing Your Garden For Tilling
Clearing The Garden Area
Before you start tilling, it’s important to clear the garden area. Follow these steps to ensure the area is ready for tilling:
- Remove any rocks, sticks, or other debris from the garden bed. This will prevent any obstructions or damage to your tiller.
- Pull out any remaining plants or weeds by hand. This will reduce the chance of getting plant material tangled in your tiller.
- If the garden bed is built up, use a shovel or hoe to level it out. This will make tilling easier and ensure an even surface for planting.
Soil Testing
Testing your soil is an essential part of garden preparation. This will help you determine if your soil is suitable for growing the plants you want and if any changes are necessary.
- Purchase a soil testing kit from your local garden center or request a soil test from your county extension office.
- Follow the instructions on the test kit to take a soil sample from your garden bed.
- Send the sample to the testing facility or follow the instructions on the soil test kit to test the soil yourself.
- Review the results of the test to determine the ph level, nutrient levels, and any necessary improvement of soil quality.
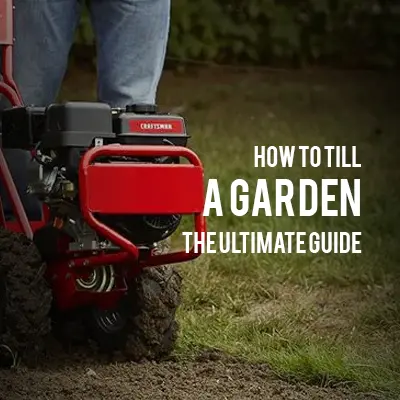
Choosing The Right Tiller
Choosing the right tiller can make or break your tilling experience. Here are some tips for selecting the right tiller for your needs:
- Consider the size of your garden bed. If you have a small garden bed, a hand tiller or electric tiller may be sufficient. For larger areas, a gas-powered tiller may be necessary.
- Look for a tiller with adjustable tines. This will allow you to adjust the depth of the tiller, making it easier to till the soil to the necessary depth.
- Check the width of the tiller. A wider tiller will cover more ground but may be more challenging to maneuver in tight spaces.
By following the steps, you’ll be well on your way to preparing your garden for tilling. With the right tools and preparation, you’ll be on your way to a bountiful harvest in no time!
Tilling Techniques For Different Types Of Soil
Understanding Different Types Of Soil
Before starting to till your garden, it is important to understand the type of soil you have. There are generally three types of soil: sandy, clay, and loamy. Each soil type has its own characteristics and requires specific tilling techniques for optimal results.
Tilling Techniques For Sandy Soil
Sandy soil is characterized by its coarse texture, which can make it difficult to retain water and nutrients. Here are some techniques to consider when tilling sandy soil:
- Mix in organic matter: Sandy soil needs more organic matter to retain water and nutrients. Add compost, manure, or other organic matter to your soil before tilling it.
- Use a shallow tilling depth: Tilling too deep can cause the soil to become too loose, which can result in nutrient loss and make it difficult for plants to take root. For sandy soil, use a tilling depth of 6-8 inches.
- Use a tiller with narrow tines: A tiller with narrow tines will ensure that the soil is tilled without making it too loose.
Tilling Techniques For Clay Soil
Clay soil is characterized by its fine texture and high nutrient content. However, it also has a tendency to become compacted, which can make it difficult for plant roots to pierce the soil. Tilling can improve the texture of clay soil, but it needs to be done carefully.
Here are some techniques to consider when tilling clay soil:
- Wait for the right time to till: Avoid tilling clay soil when it is too wet or too dry. It is best to wait until the soil is slightly moist and easy to work with.
- Use a deep tilling depth: Since clay soil is so dense, it is important to till it deeply to ensure that the soil is loosened. A tilling depth of 10-12 inches is optimal for clay soil.
- Choose a tiller with wide tines: A tiller with wide tines will ensure that the soil is well aerated, which is essential for clay soil.
Tilling Techniques For Loamy Soil
Loamy soil is a combination of sandy and clay soil, making it the ideal soil for gardening. It is well-drained, easy to work with, and has good nutrient content. However, it still requires proper tilling to ensure optimal results.
Here are some techniques to consider when tilling loamy soil:
- Use a medium tilling depth: Since loamy soil is a combination of sandy and clay soil, a tilling depth of 8-10 inches is optimal.
- Use a tiller with medium tines: A tiller with medium tines is ideal for loamy soil, as it will provide the right amount of aeration without making the soil too loose.
- Consider adding organic matter: While loamy soil is already nutrient-rich, adding organic matter can further improve soil health and plant growth. Consider adding compost, manure, or other organic humus to your soil before tilling it.
By understanding your soil type and using the appropriate tilling techniques, you can ensure a successful gardening season with healthy, thriving plants. Happy tilling!
Furthermore, it is recommended to read: 10 Steps to Perfectly Straight Garden Rows with a Tiller
Tips And Tricks For Efficient Garden Tilling
Tilling your garden properly can ensure the healthy growth of plants. It is an important step before planting crops, flowers, or vegetables. Here we bring you some essential tips and tricks to make your garden tilling process efficient, effective, and effortless.
Proper Tilling Depth
One of the key aspects of tilling is getting the depth right. You should ensure that you don’t till too deep or shallow. Follow these bullet points for proper tilling depth:
- Ideal depth for tilling should be between 4 to 6 inches.
- Tilling too deeply can damage the soil structure and microorganisms required to support healthy plant growth.
- Tilling too shallow can leave a humus of soil that could affect plant growth.
Correct Tiller Usage
Using the right tiller for your garden is crucial for optimum results. Here are some points to follow while using tillers:
- Choose a tiller that fits the size of your garden. A small garden could require a light-duty tiller, while larger gardens may require heavy-duty ones.
- Start tilling in one corner of your garden and slowly move across in rows to ensure that each patch is enough tilled.
- For dense soil, it is recommended to use a vertical tillage method to mix up the soil effectively.
Best Time For Garden Tilling
Timing is essential in the garden tilling process. Here is what you need to know:
- Best time to till your garden is in the spring or fall when the soil has moderate moisture.
- Avoid tilling the garden soil when it is too wet or dry as it can lead to soil clumps and uneven texture, affecting plant growth.
- Tilling during the early morning or late evening is the best time as the soil temperature is relatively low, and the moisture content is high.
Common Mistakes To Avoid
Tilling can be a challenging task, and there are some common mistakes that you should avoid:
- Over-tilling can cause soil compaction, making it difficult for plants to grow.
- Tilling when the soil is wet, can cause soil clumps and uneven texture, leading to poor plant growth.
- Turning the soil too often can destroy the soil’s structure, leading to a decrease in nutrient levels.
- Failing to remove weeds before tilling can lead to their spread and make pest control harder.
Remember, proper tilling of the garden soil leads to healthy plant growth, and high yield, and ensures an overall good harvest. By following these tips and tricks, you can garden like a pro.
Read also: Revitalize Your Lawn
Post-Tilling Garden Maintenance
Once you have tilled your garden, it’s important to perform specific tasks to ensure that your garden remains productive. Post-tilling garden maintenance is crucial to keep your garden beds in top condition. Here are the key things you should do:
Removing Debris And Rocks
After tilling, it’s common to have debris and rocks left in the bed. This includes both large and small stones, weeds, and other plant matter. Removing debris and rocks is vital to ensure that your garden beds remain in good condition.
Here are a few things to keep in mind:
- Remove large rocks, plants, and any other large debris first. This will give you a clear area to work with.
- Use a garden rake to remove any smaller scraps. Make sure to remove everything that could potentially disrupt plant growth.
- Don’t hesitate to use your hands to pick up anything that the rake can’t get. This will ensure a clean and level bed.
Adding Organic Matter
Adding organic matter to your garden beds is critical for the growth of healthy plants. Organic resources add vital nutrients, improve soil structure, and help retain soil moisture levels. Here are a few things to keep in mind:
- You can use compost or well-rotted manure as organic matter. Both are rich in nutrients and will provide a significant boost to your soil health.
- Spread a layer of organic matter over your garden bed, about two to three inches deep, and work it into the soil using a garden fork or hoe.
- Be sure to water your garden bed thoroughly once you’ve added your organic matter. This will allow the nutrients to penetrate the soil and begin to benefit your plants.
Cultivating The Soil
Cultivating the soil after tilling helps to ensure that your garden bed remains loose and easy for root growth. Here are a few things to keep in mind:
- Use a garden hoe or fork to loosen the soil after tilling. This will help to break up any remaining clumps and aerate the soil.
- Cultivate the soil as deep as possible. This will allow plant roots to grow easily and access all the necessary nutrients.
- Be careful not to overwork the soil or cultivate it too deeply. Doing so can damage your soil structure and make it difficult for plants to grow.
By following these post-tilling garden maintenance tips, you’ll be sure to have a successful growing season.
Frequently Asked Questions Of How To Till A Garden
How Deep Does The Soil Need To Be Tilled For A Garden?
Soil depth for tilling a garden depends on the type of plants to be grown. For root vegetables, 8-12 inches deep. For flowers, 6-8 inches deep. For most vegetables, 4-6 inches deep.
What Equipment Is Needed For Tilling A Garden?
You’ll need a tiller, gloves, safety glasses, and ear protection. If you don’t have a tiller, you can use a shovel, hoe, or rake. Tillers can be rented from equipment rental stores.
When Is The Best Time To Till A Garden?
Best time to till a garden is in the spring or fall. In spring, wait for the soil to dry out before tilling. In fall, till after the first frost when the soil is dry but not frozen. Avoid tilling when the soil is too wet or dry.
How Do You Prepare Soil Before Tilling A Garden?
Clear any waste from the garden plot. Spread compost or other organic materials on top of the soil and till them in with a tiller or garden fork. Add fertilizer if needed. Water the soil after tilling.
How Long Does It Take To Till A Garden?
Time it takes to till a garden depends on the size of the garden and the type of equipment used. It takes about 2 to 4 hours to till a small garden with a tiller, while it can take a full day or more for larger gardens.
Conclusion
After going through the steps of how to till a garden, you should now be well-equipped to prepare your garden for planting. Tilling not only helps with soil aeration and nutrient distribution, but it also gives your plants the best chance to grow to their fullest potential.
Remember to start by assessing the area and clearing any debris or weeds that could be obstacles to the tilling process. Then, set your tilling depth and method to match your soil and garden needs. Don’t forget to replenish the soil with organic matter after tilling and add appropriate fertilizers to ensure that your plants grow.
Lastly, always prioritize safety and take proper precautions when operating a tiller. By following these steps and tips, you can enjoy a healthy and fruitful garden for the seasons to come.