Having a well-manicured lawn not only enhances the beauty of your home but also creates a sense of pride for any homeowner. One essential aspect of lawn care is edging, which provides a crisp, clean separation between your lawn and other landscaping features, such as sidewalks, driveways, flower beds, or garden paths. Edging helps maintain a polished and organized look, elevating the overall appeal of your yard. In this comprehensive guide, we will take you through the process of edging your lawn in 10 easy steps, ensuring you achieve a picture-perfect finish that will be the envy of the neighborhood.
Step 1: Gather Your Tools
Before you begin, make sure you have all the necessary tools on hand. You will need a lawn edger (either manual or powered), a shovel, a garden hose, a string trimmer, a rake, and safety gear, including gloves and protective eyewear. Having everything prepared in advance will save you time and make the process smoother.
Step 2: Choose the Right Time
Timing is crucial when it comes to edging your lawn. The best time to edge is when the soil is slightly moist but not overly wet. Early morning or late afternoon, when the sun is not scorching, are ideal times. Avoid edging during the heat of the day or when the ground is frozen, as it can be challenging to work with hardened soil.
Step 3: Define the Edge
Use the garden hose to mark the outline of the edge you want to create. The hose provides flexibility, allowing you to experiment with different shapes and curves. Once you’re satisfied with the layout, use a spray paint or chalk to trace the hose’s path directly onto the grass, providing a clear guide for the edging process.
Step 4: Clear the Area
Before you start edging, remove any debris or obstacles from the designated area. Check for rocks, sticks, or roots that might hinder the edging tool’s smooth movement. Clearing the area ensures a seamless edging process and prevents damage to your tools.
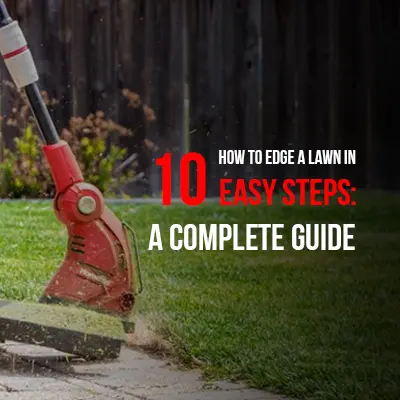
Step 5: Edge with Precision
Now comes the exciting part – edging your lawn. If you’re using a manual edger, position it at the beginning of the marked line and apply steady pressure as you move along the path. For powered edgers, follow the manufacturer’s instructions for safe and effective operation. Keep a consistent pace and maintain a straight line to achieve a professional-looking edge.
Step 6: Trim Excess Growth
After edging, there may be some overgrown grass along the edge. Use a string trimmer to carefully trim any excess growth, making sure to avoid cutting into the newly created edge. The trimmer will give your lawn a polished appearance, leaving no uneven patches behind.
Step 7: Rake and Clean Up
Once you’ve edged and trimmed, it’s time to tidy up the area. Use a rake to collect the grass clippings and any debris that may have accumulated during the process. A clean and well-maintained lawn edge will make your yard look pristine and well-cared-for.
Step 8: Add a Barrier (Optional)
To prevent grass from spreading into the flower beds or garden paths, consider adding a barrier. You can use plastic, metal, or concrete edging strips to create a clear separation between the lawn and other landscaping elements. The barrier not only enhances the visual appeal but also eases future maintenance.
Step 9: Apply Fertilizer and Water
To encourage healthy growth and recovery, apply a suitable lawn fertilizer after edging. Follow the manufacturer’s instructions for the right dosage and application method. Additionally, water the newly edged lawn thoroughly to help the grass settle and promote root development.
Step 10: Maintain Regularly
Congratulations! You’ve successfully edged your lawn and achieved a well-defined, professional look. To keep your yard in top condition, make edging a part of your regular lawn maintenance routine. Regular edging will prevent grass from encroaching into other areas and maintain the visual appeal of your landscape.
Additionally, check out: How to Use a Lawn Edger
FAQ: How to Edge a Lawn in 10 Easy Steps
To edge your lawn effectively, you’ll need a lawn edger, gloves, safety glasses, a shovel, and a string trimmer.
It’s best to edge your lawn in the early spring or late summer when the grass is actively growing.
Before edging, ensure your lawn is freshly mowed and free of debris. Mark the desired edge line with a string or chalk for guidance.
Hold the lawn edger steady and walk along the marked line, making a vertical cut to create a neat edge. Follow the contour of your lawn for the best results.
Yes, you can use a string trimmer for edging, but it may not provide as clean and precise results as a dedicated lawn edger.
It’s recommended to edge your lawn at least once a month during the growing season to maintain a polished look.
After edging, use a shovel to remove the excess soil and grass clippings. You can also apply a natural mulch or landscaping material along the edge for a more defined look.
Absolutely! Always wear appropriate safety gear, such as gloves and safety glasses. Be cautious of the lawn edger’s blade and keep it away from children and pets.
Conclusion
Edging your lawn might seem like a daunting task, but by following these 10 easy steps, you can achieve a perfectly manicured yard that enhances the overall beauty of your home. Remember to gather the necessary tools, choose the right time, and define the edge before you start. Take your time while edging, and trim any excess growth for a polished look. Cleaning up the area and adding a barrier are optional but can significantly enhance your lawn’s appearance and make future maintenance more manageable. Lastly, maintain your lawn regularly to preserve its pristine look throughout the year.
So, don your gardening gloves, grab your edger, and transform your lawn into a stunning masterpiece that will be the envy of your neighborhood. Happy edging!
1 thought on “How to Edge a Lawn in 10 Easy Steps: A Complete Guide”